
Picklists are a quick and easy way to categorize your data based on different variables. They allow you to easily report on and extract information. On occasion, you may need to add, rename, or deactivate the values within your picklist.
Steps to add, rename, and deactivate picklist values:
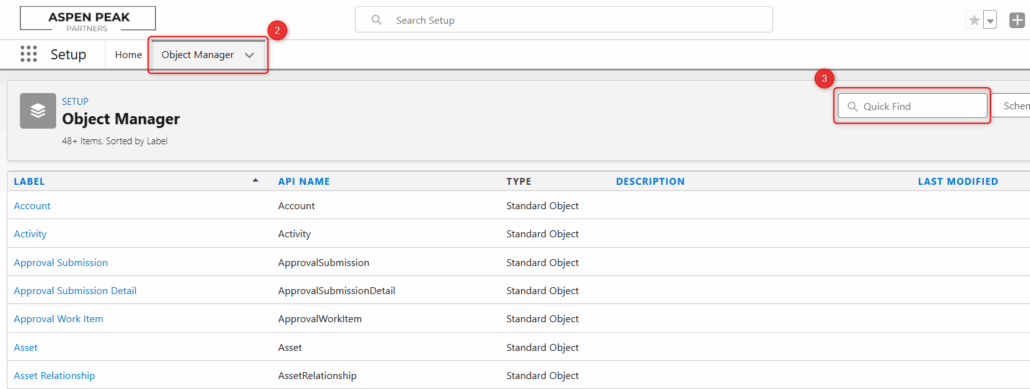
- Navigate to the gear icon in the top right-hand corner of the screen and click ‘Setup’
- In the Navigation Bar, select ‘Object Manager’
- In the quick find box, search for the object where your picklist lives
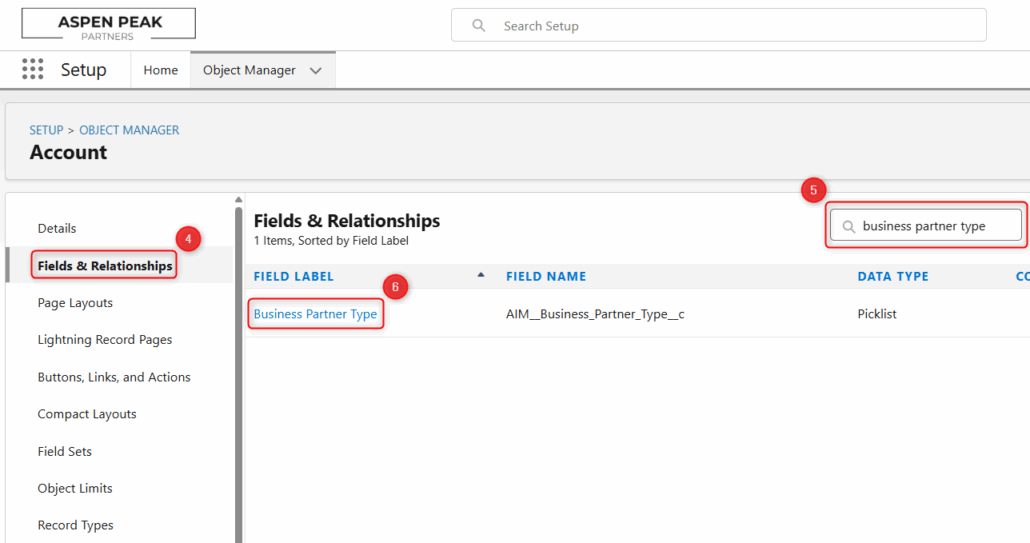
- Once on the object, click ‘Fields and Relationships’ in the left-hand panel
- Use the Quick Find box to search for the picklist field. Note that the column to the right of the Field Name will indicate the data type for the field (i.e. Picklist, Text Box, Number Field, Checkbox, etc.)
- Select the Field Label
- Scroll to the bottom where the picklist values are listed.
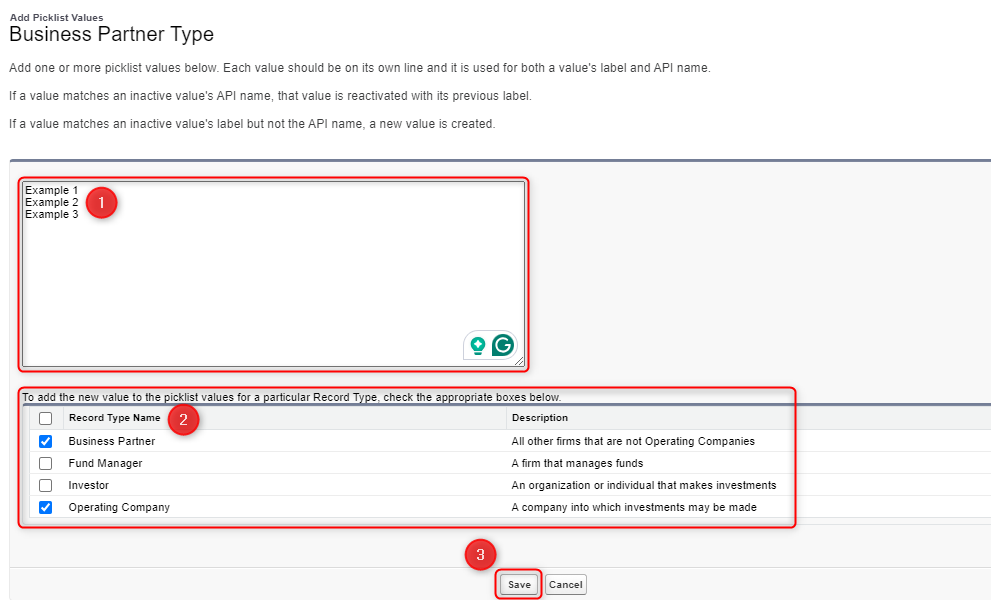
- To add new values, select ‘New’ and follow the instructions below:
- Enter the values into the textbox (If entering multiple values, press the enter key and separate each value on its own line)
- Once finished, locate the ‘Record Type Name’ section at the bottom. Check the box next to each record type you want the value to appear on
- Click ‘Save’
Note: If the values do not appear on the front end after adding, follow the steps on “How to Add Picklist Values to a Record Type”
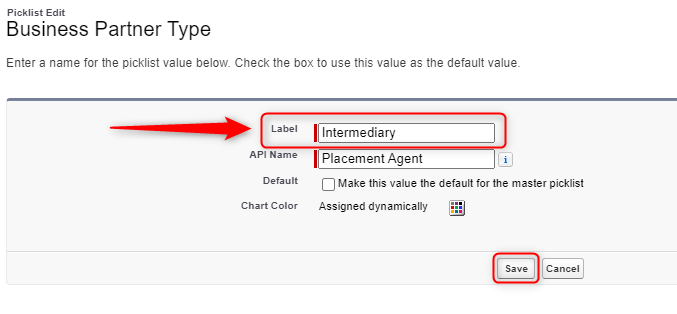
- To rename active values:
- From the ‘Values’ section, click ‘Edit’ next to the value
- Here you will see 2 fields, ‘Label’ and ‘API Name’. Only modify the ‘Label’ field and do not change the ‘API Name’ field. Modifying the ‘API Name’ may cause existing automation to break
- Click ‘Save’
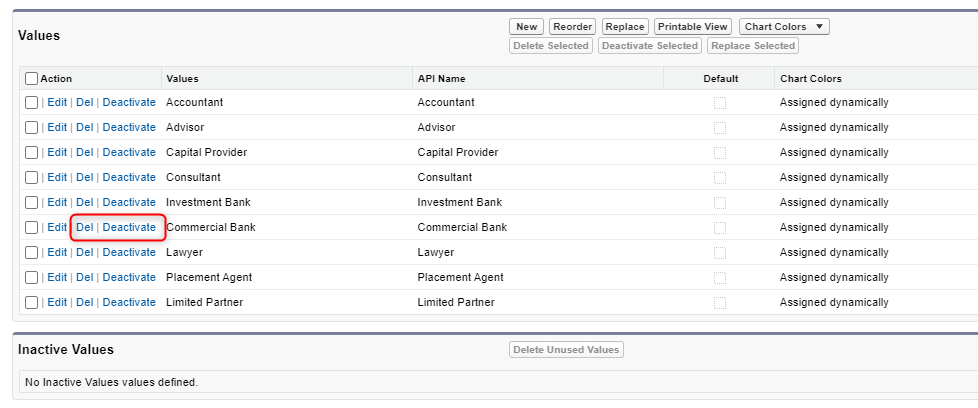
- To deactivate values:
- From the ‘Values’ section, you have 2 options with very unique differences.
- ‘Del’ (delete) – selecting this option will remove the value permanently and delete all historical data with this value. It is best practice to deactivate values to keep your historical data
- ‘Deactivate’ – This option will maintain the historical data that has this picklist value selected. The picklist value will remain on the record, however, the value will not be selectable from the picklist in the future. The value will be moved from the ‘Values’ section into the ‘Inactive Values’ section. From here, you can choose to reactivate the value. No data will be lost and this is the recommended option
Best Practices for making changes to picklist values:
- When editing existing picklist values, do not make changes to the ‘API Name’ without consulting Altvia Support first
- Do not ‘Del’ (delete) a value as it will remove all pre-existing data with that value. We recommend deactivating values so they retain the data, but will not be a selectable option moving forward
- If making changes to ‘Stage’ picklist values, consult with Altvia Support to ensure the custom settings are updated as well