Salesforce provides Admins the ability to add, remove, or reorder the fields that are displayed on a Related List.
Prerequisite:
- The Salesforce Admin will need to have the ‘Customize Applications‘ permission checked on their profile within Setup to make the adjustments detailed below.
Steps:
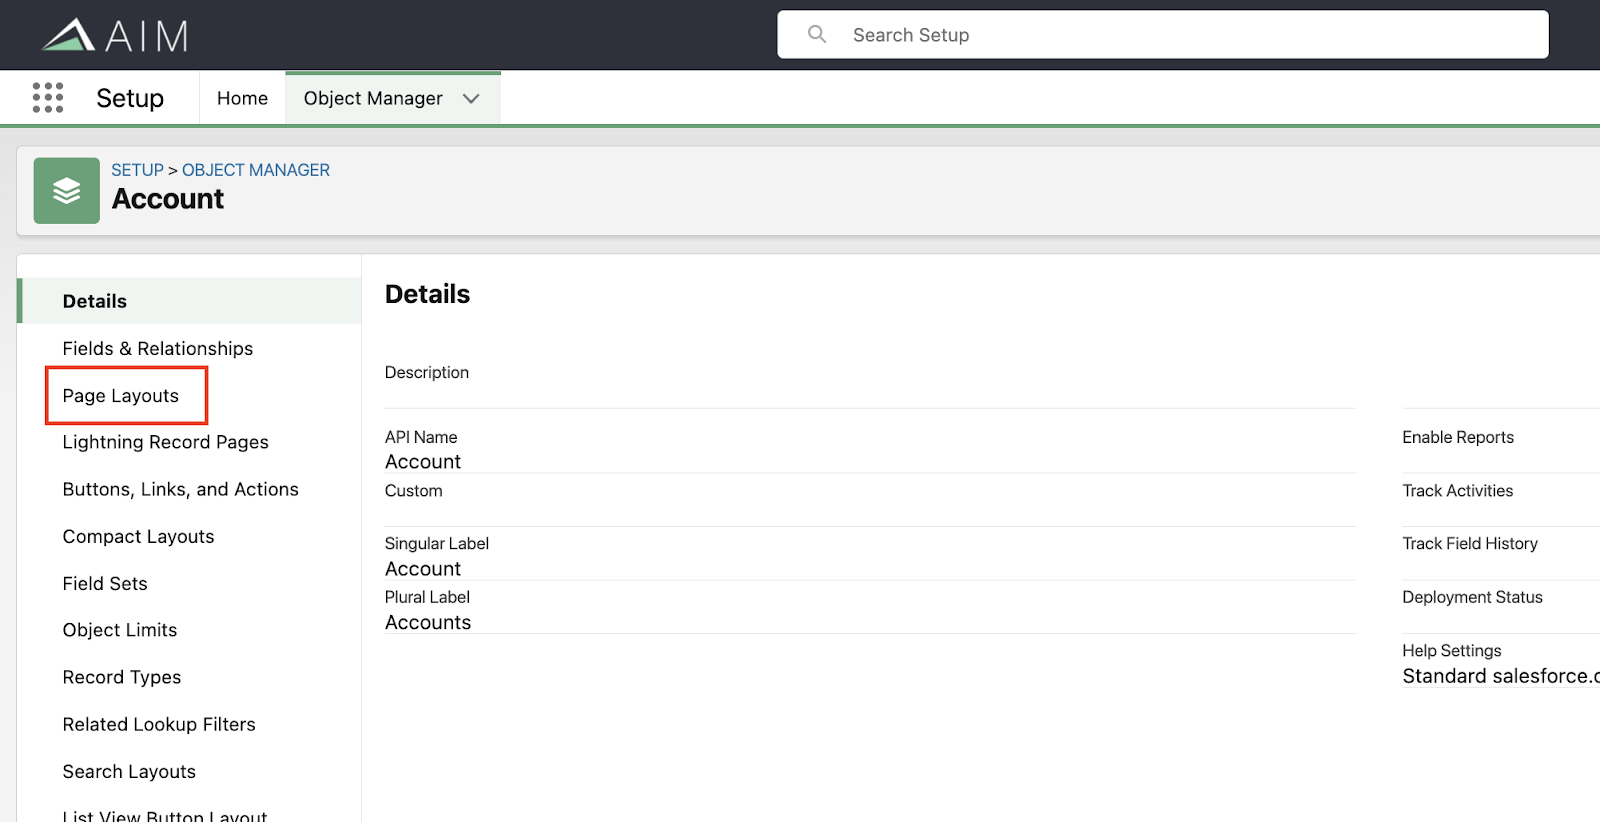
- Click the gear icon in the top right-hand corner and select ‘Setup’
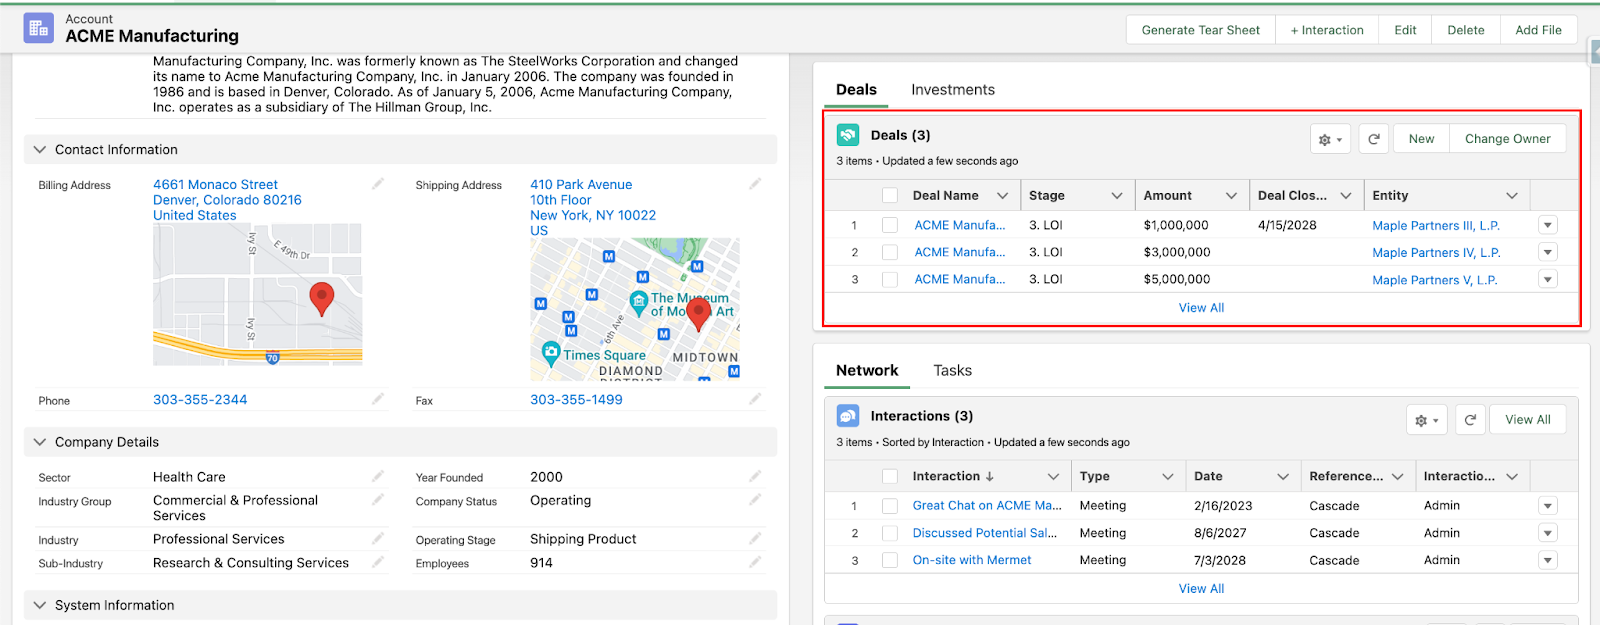
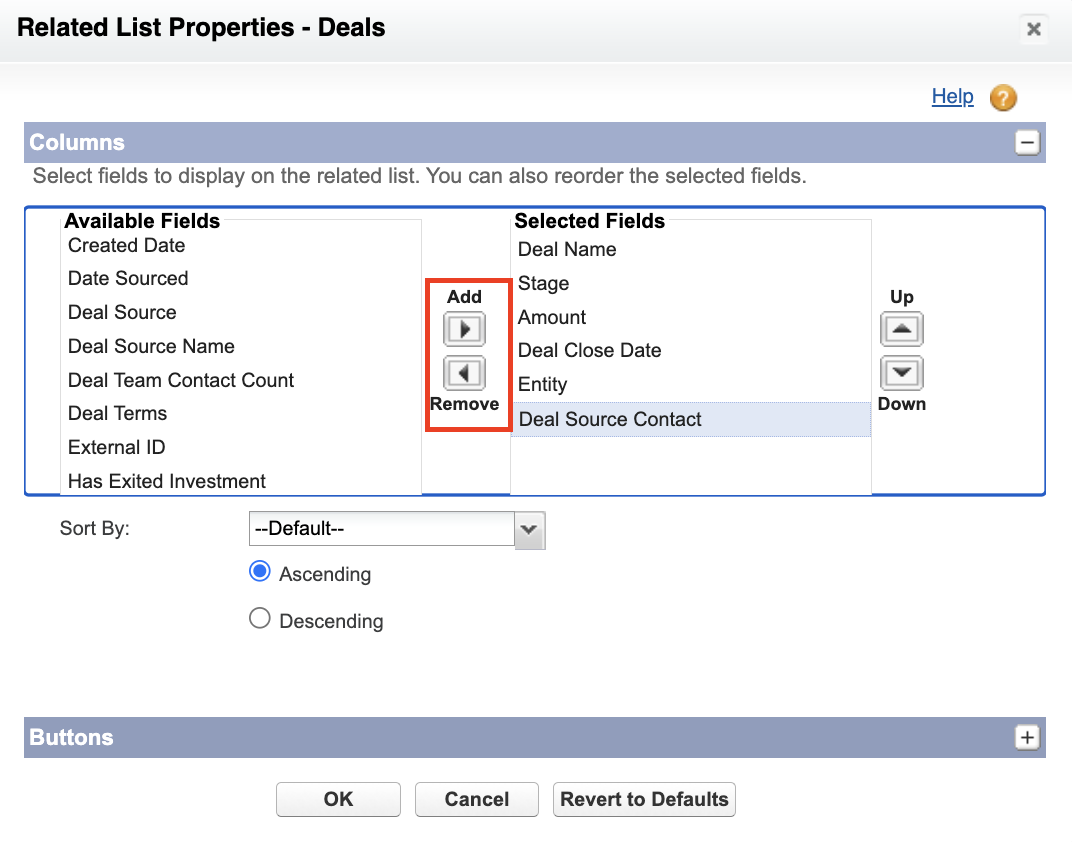
- Click ‘Object Manager’, and navigate to the object that contains the Related List you’d like to update. Per the screenshot above, for this example, I am going to update the fields displayed on the ‘Deals’ Related List on the Account object.
- Now within the ‘Object Manager’ screen, click ‘Page Layouts’.
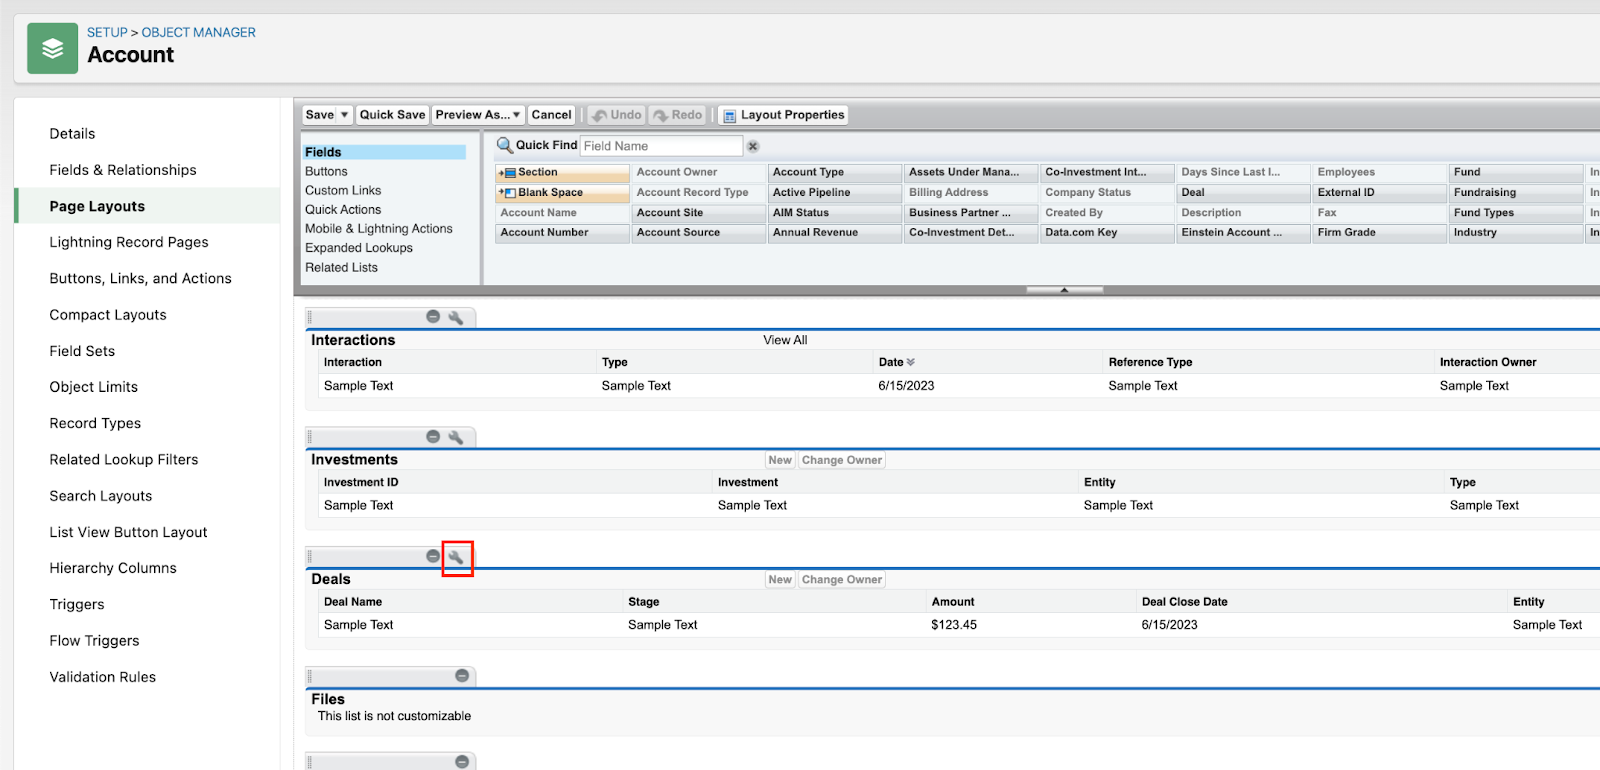
- Select the layout that contains the Related List that you’re trying to update.
- Scroll towards the bottom of the screen where you’ll see the ‘Related Lists’ section.
- Click the wrench icon of the Related List that you’re updating.
- Add or remove fields and reorder them as you see fit.
- Keep in mind that you can only include up to 10 fields per related list.
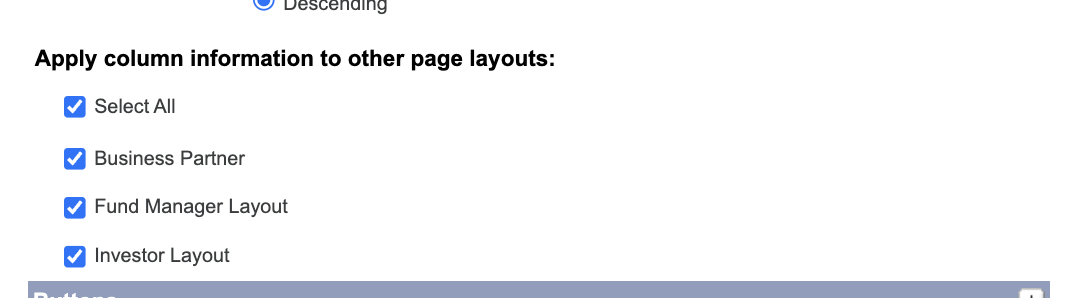
- Scroll down and apply the changes to the other layouts that contain this Related List.
- When finished, click ‘OK’ and then scroll to the top of the page and click ‘Save’ to finalize the changes.
- Return to a record of that object in AIM to see the changes you made.
- This process can be followed for any Object, Related List, and Layout.
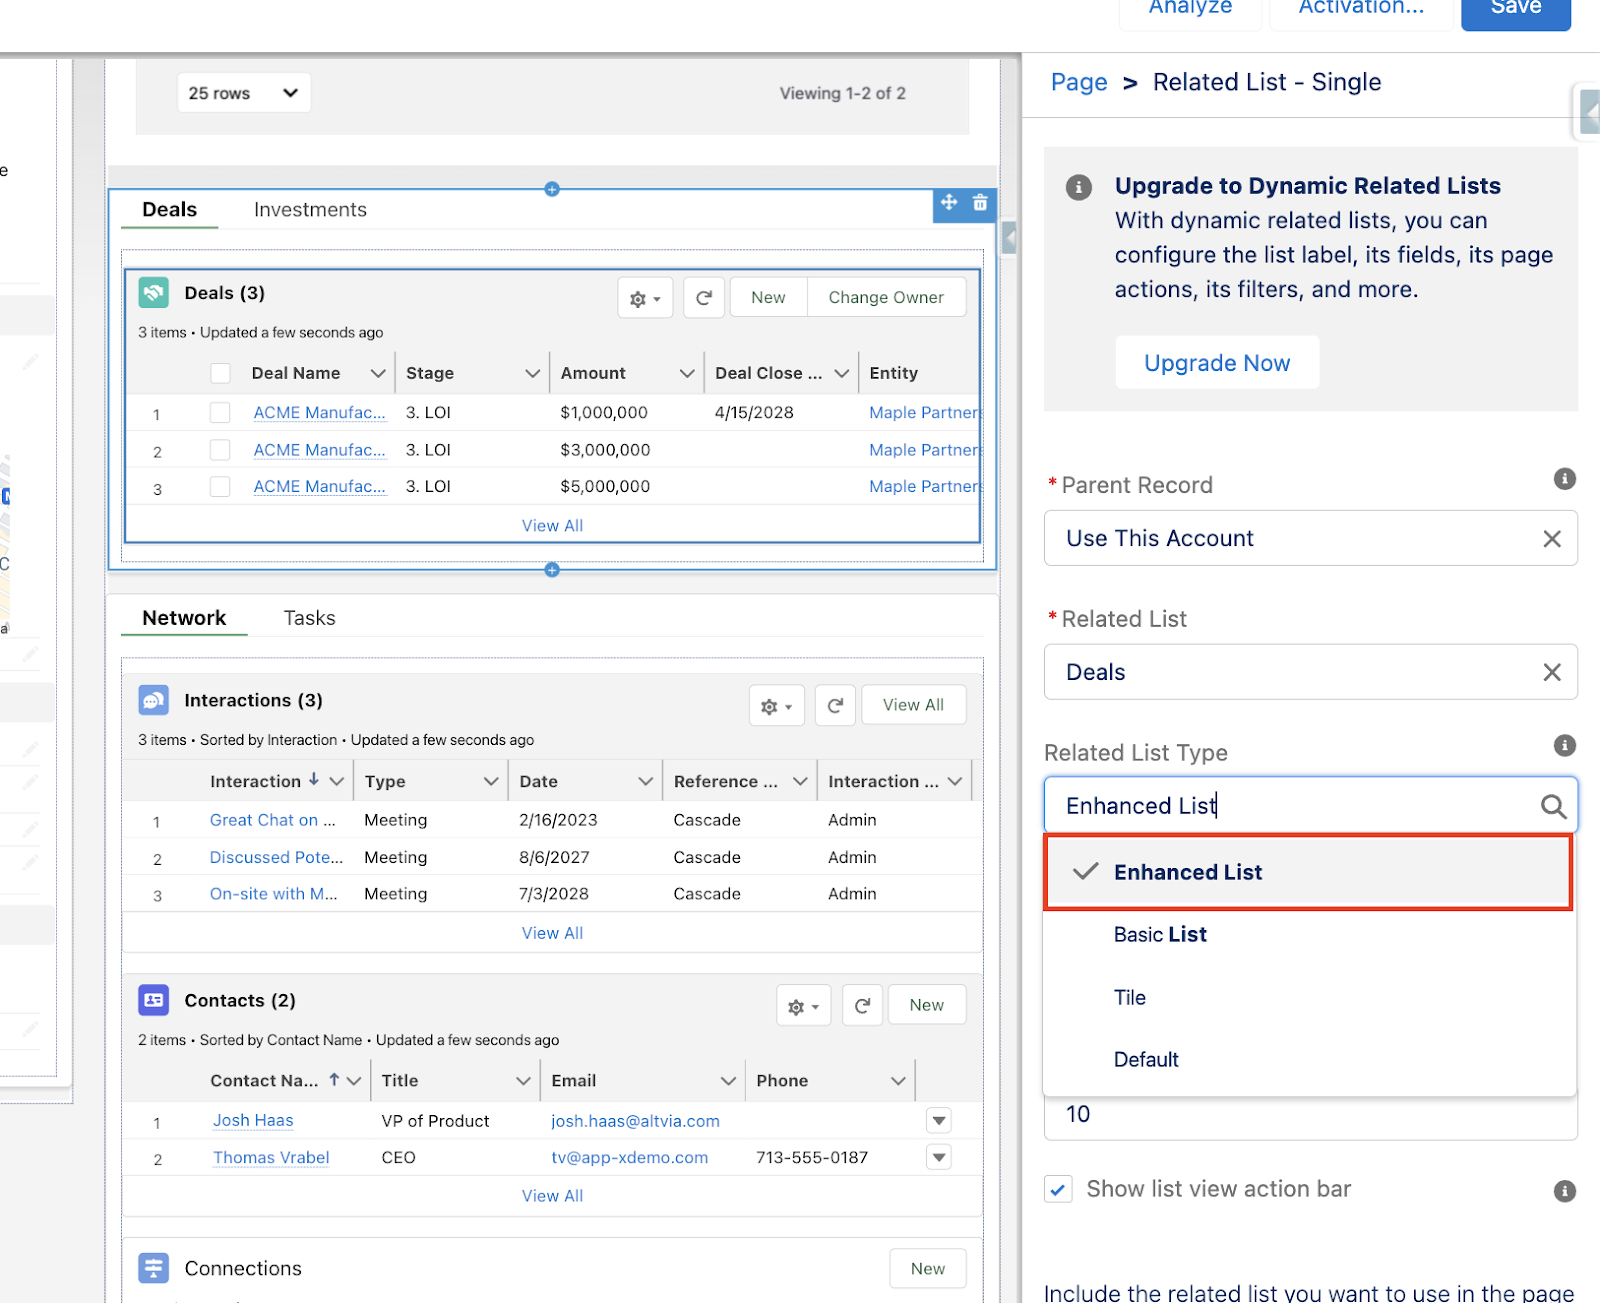
Note: To display more than the first four fields in the Salesforce Lighting environment, admins need to select the related list component in the Lightning App Builder and choose ‘Enhanced List’ as the related list type for that section.