When managing deals or fundraising opportunities, users often follow a consistent series of steps or action items to move them through the pipeline. Checklists help streamline this process by attaching these necessary tasks to each opportunity, allowing teams to track, monitor, and update their progress. Follow the steps below to create and utilize checklists on the Deals, Fundraising, Funds, and Pipeline objects, ensuring that every opportunity stays on track and is managed efficiently.
Steps:
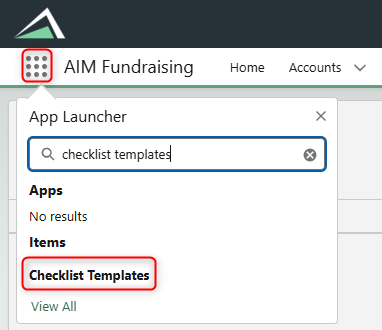
- You will start by creating the template of a checklist. Search ‘Checklist Template’ in AIM in the App Launcher
on the top left corner of your screen.
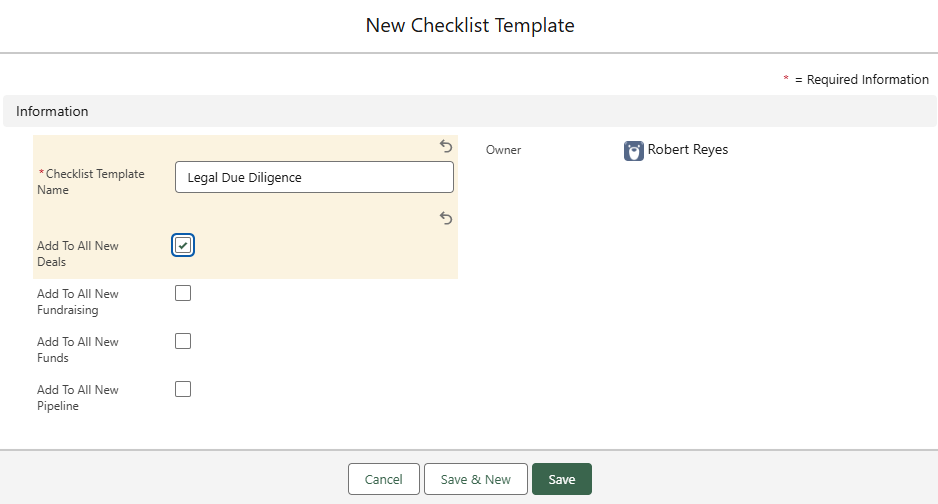
- Select ‘New’ to create a New Checklist Template, select the appropriate object you are looking to generate a checklist for (you can select more than one). Give the checklist template a name.
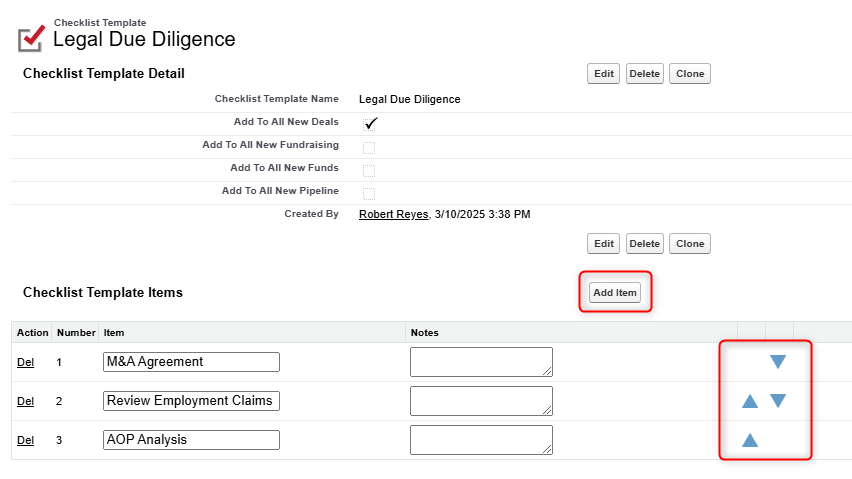
- After saving the Checklist Template, you can add ‘Checklist Template Items’ to track the items in your checklist by clicking ‘Add Item’. You can sort and order your checklist items using the blue arrows under the ‘Checklist Template Items’ section.
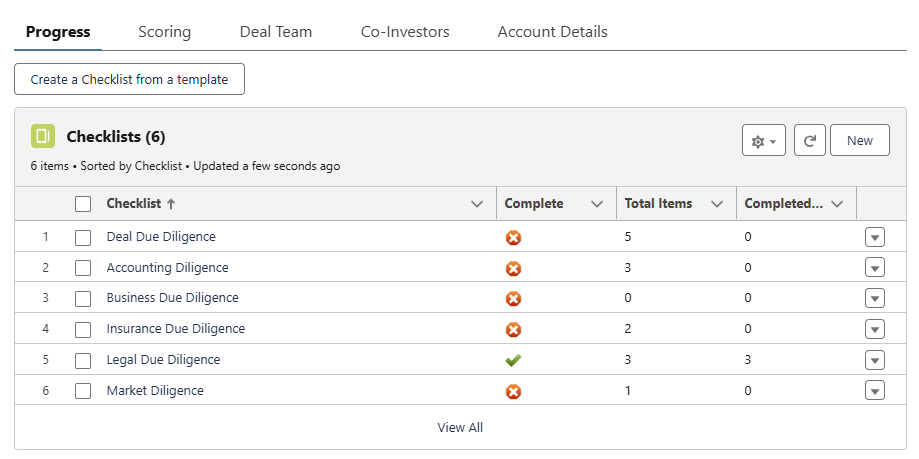
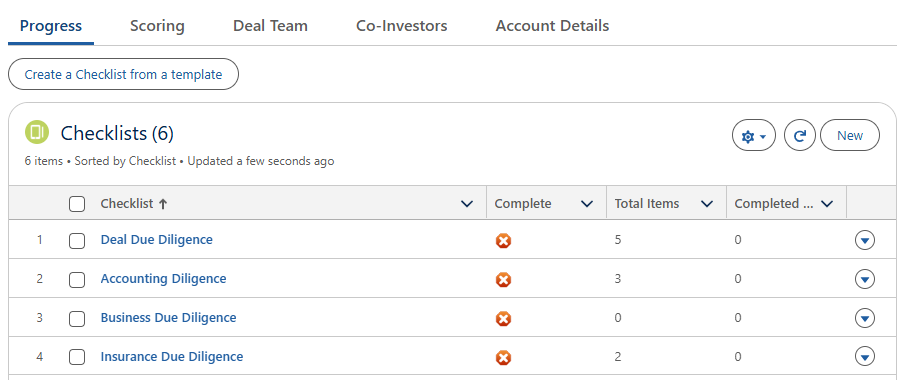
- Once you create a new Deal (or any other object that you assigned your checklist to), you will see your checklist populate under the ‘Checklists’ object (Note: The checklist-related list needs to be added to the page layout and lightning record page to see the Checklists).
- By clicking on the Checklist, you can manage each checklist item. Using the caret drop-downs on the right-hand side of the screen, you can update the status, notes, etc.
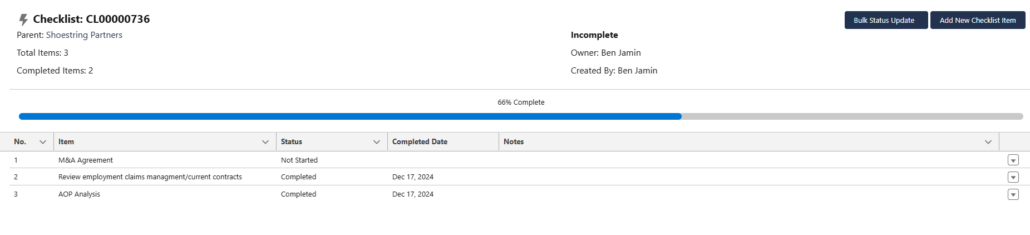
- Once your checklist is complete, a green checkmark will appear, indicating that all checklist items have been completed on the parent record.