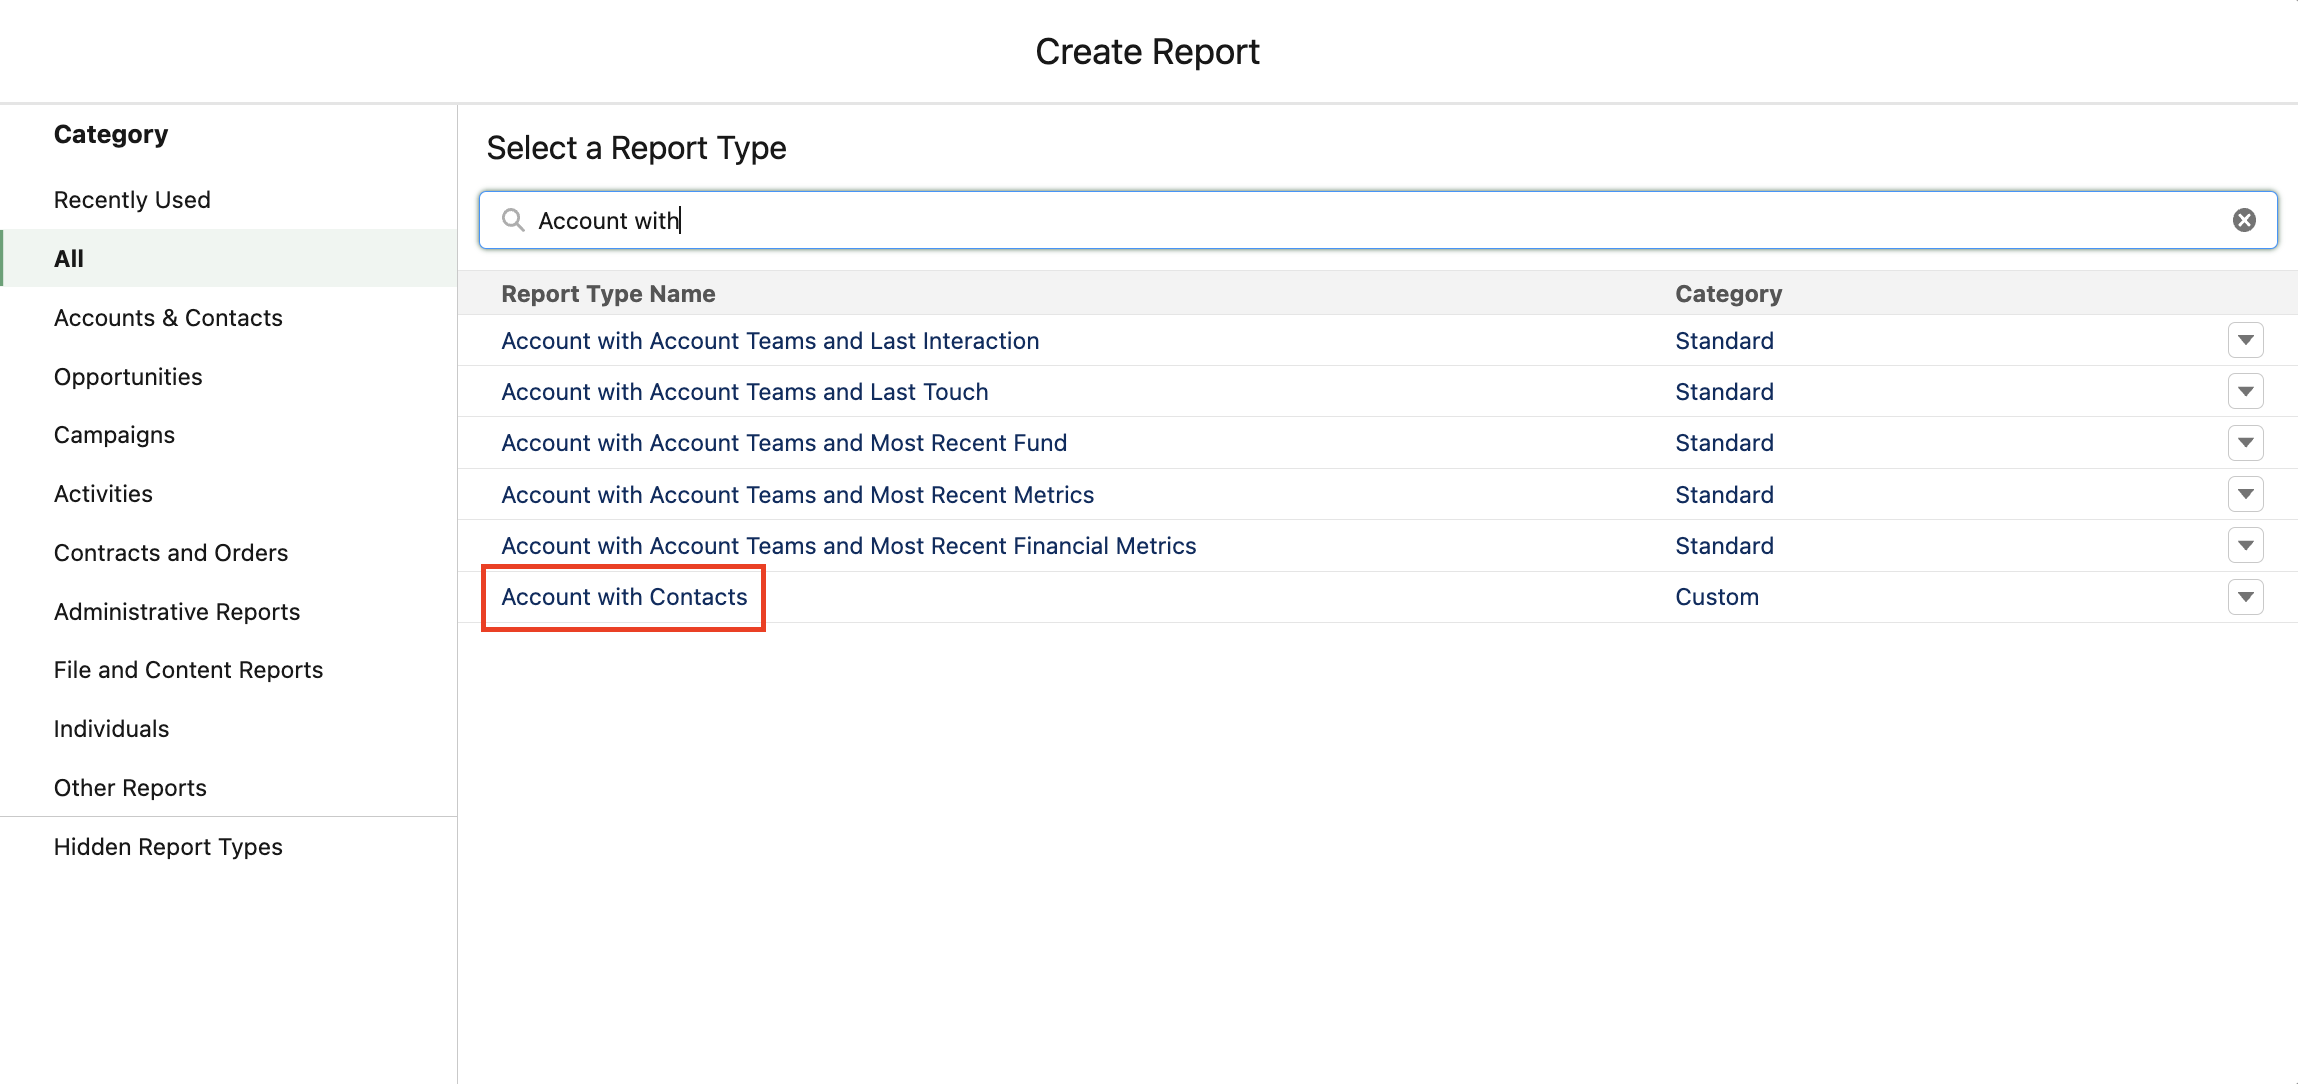
Have you ever struggled to find the correct report type for the report you want to create? CRM users can create custom report types when the standard Salesforce report types don’t provide enough visibility into the records and fields needed. This enables users to create reports from predefined objects, object relationships, and specific fields.
Permissions Required:
- Full Salesforce license
- “Manage Custom Report Types” permission checked
Navigation:
- Navigate to the gear icon in the upper right-hand corner and click ‘Setup’.
- In the Quick Find bar, type ‘Report’ and select ‘Report Types’.
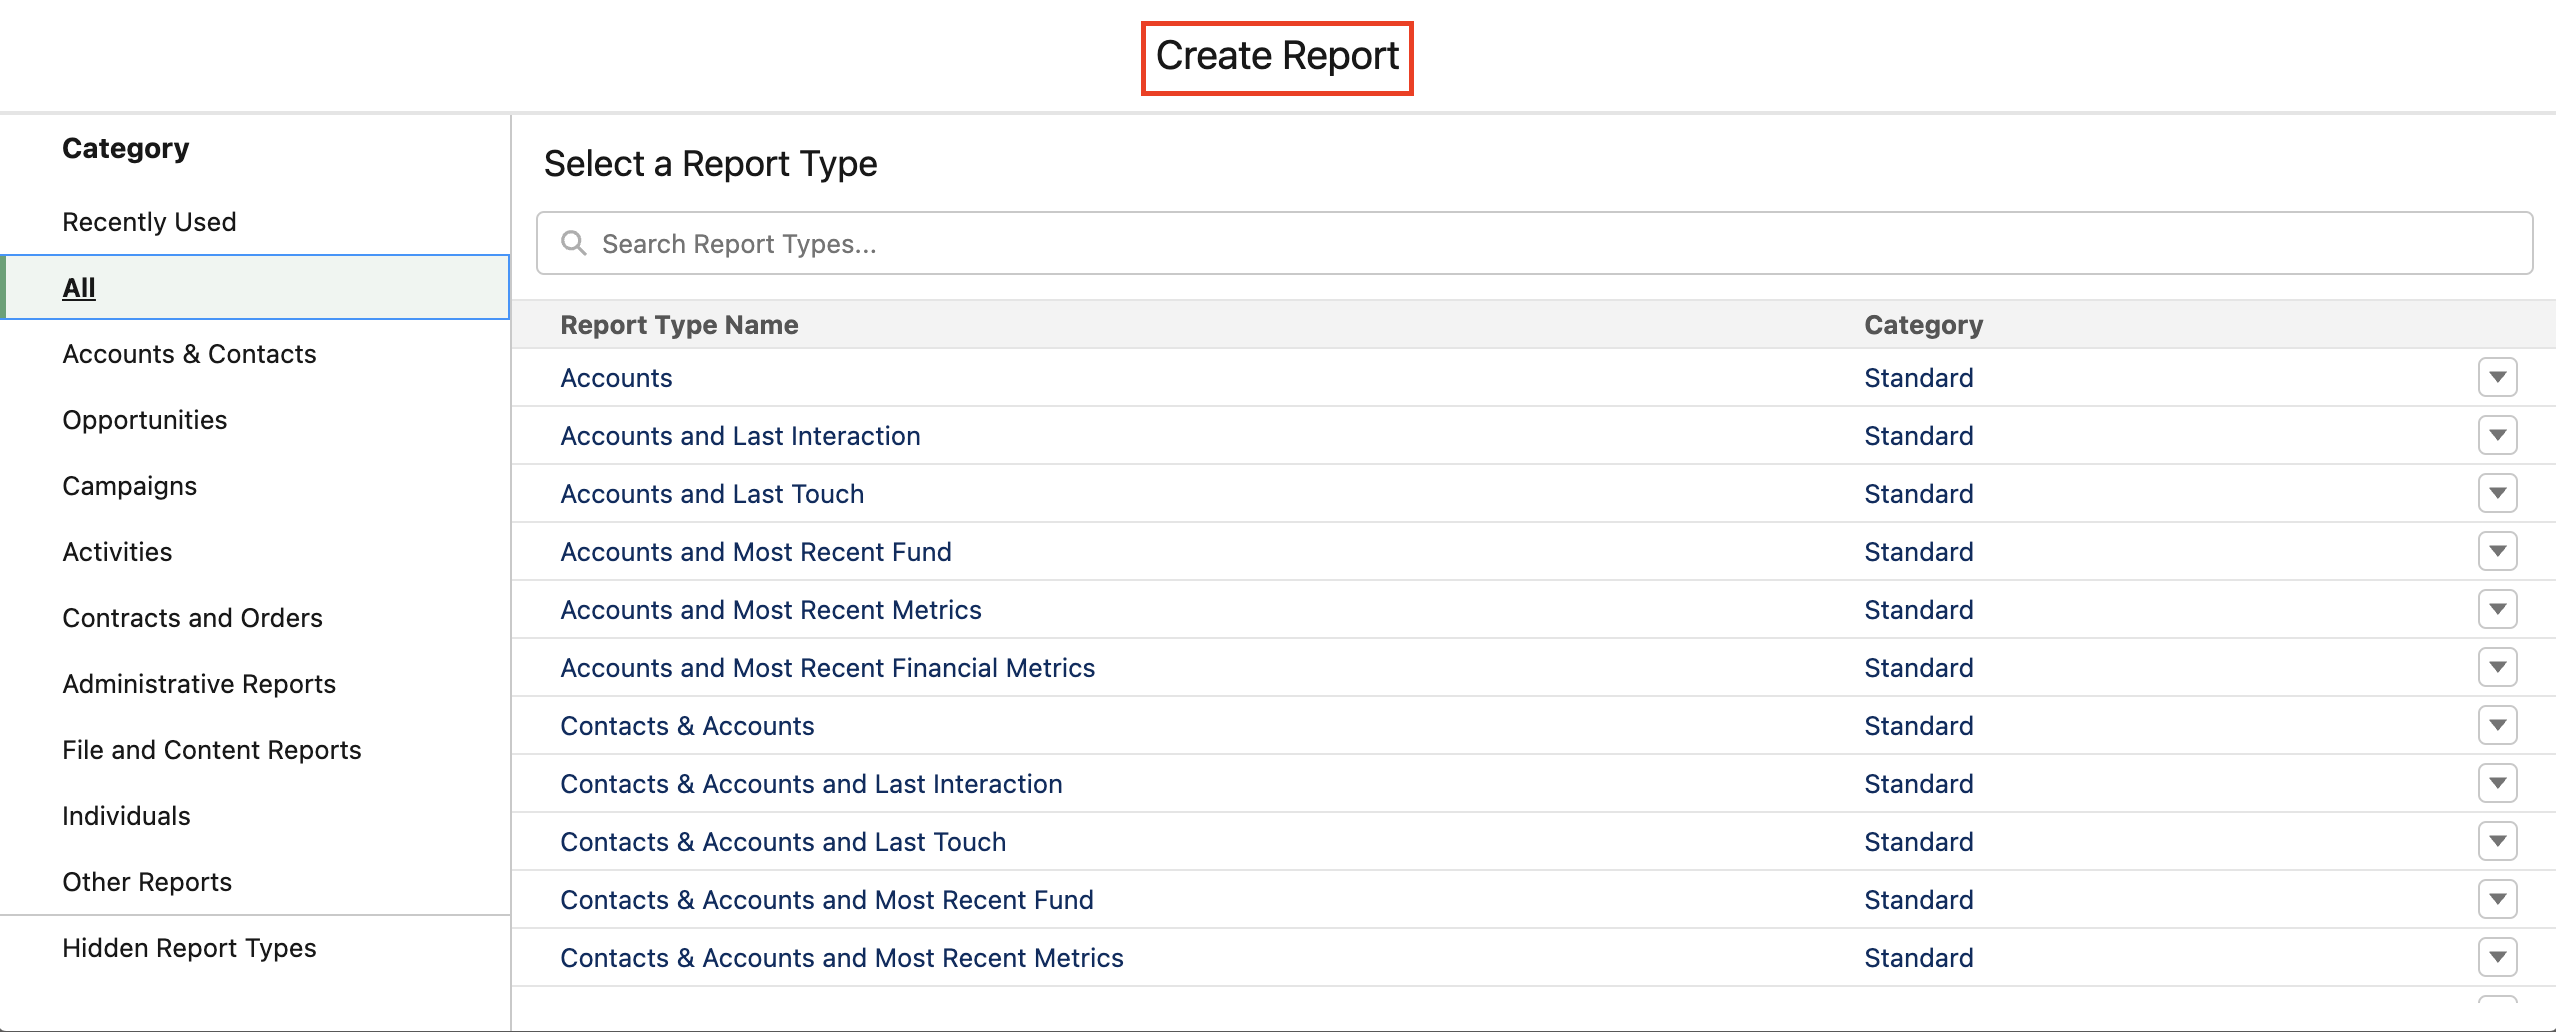
- Here, you will be able to view all of the Custom Report Types already available.
- To begin the process of creating a new report type, click ‘New Custom Report Type’.
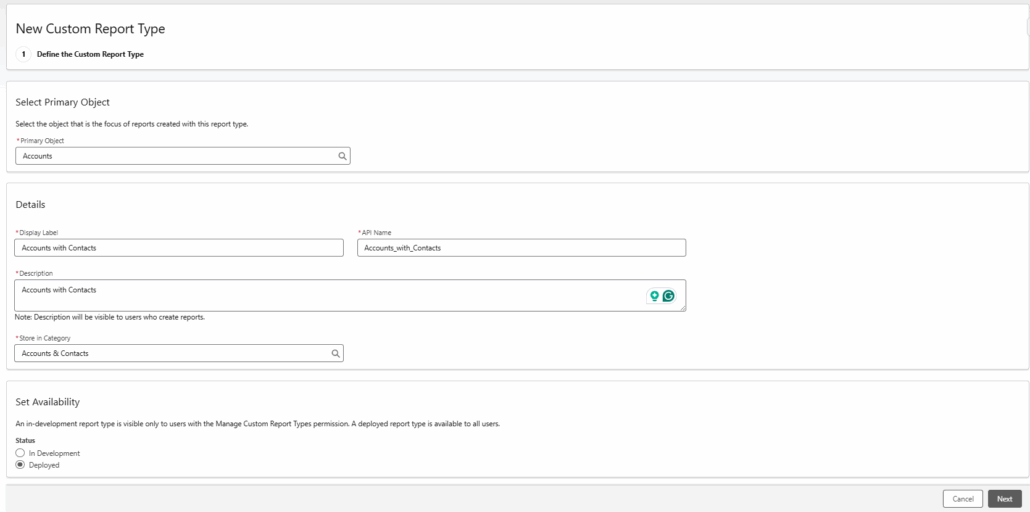
Step 1. Define the Custom Report Type:
- The first step is to choose the primary object to determine which will be the focus of reports generated by this report type.
- For example, if reporting on ‘Accounts with Contacts’, select ‘Accounts’ as the primary object.
- Next, in the ‘Report Type Label’ field, enter a name that identifies what it will report on.
- To keep consistent with the example above, I would simply label the report type as ‘Accounts with Contacts’.
- In the Description field, give users a quick overview of what this report type reports on.
- Choose the appropriate picklist value in the “Store in Category” field depending on the objects used in this custom report type.
- Lastly, if you want this report type available to choose from (you’ll check this 99.9% of the time), select “Deployed” in the “Deployment Status” field. Otherwise, select “In Development” if you’d like the report type to only be visible to authorized administrators and their delegates.
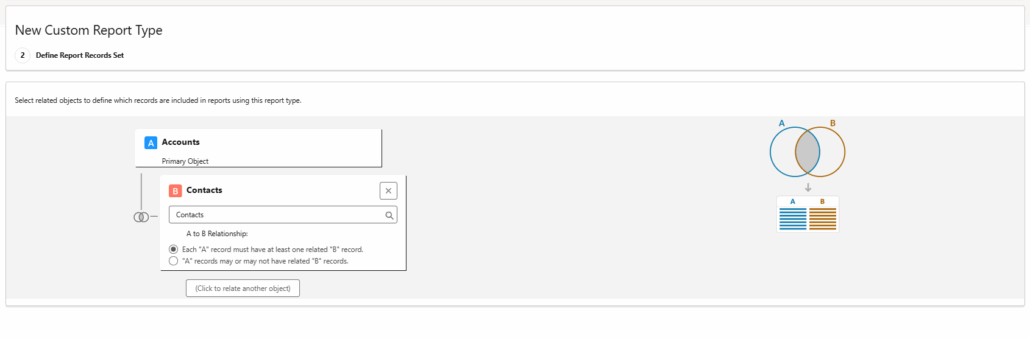
Step 2. Define Report Records Set:
- Next, we are going to define the object relationships of this record type. I will choose the Contacts object to relate to Accounts, the primary object previously chosen. Accounts is the parent object and contacts is the child object. You can select up to a maximum of three child objects when creating a custom report type.
- Since we want to report on Accounts with Contacts, I’m going to select the first checkbox, ‘Each “A” record must have at least one related “B” record’. This means that an Account must have at least one Contact associated to be able to show up with this report type. Thus, only parent records with child records are shown in the report.
****You also have the option to select the second option, “A” records may or may not have related “B” records. In this example, the report would show Accounts with or without Contacts****
Step 3. Fields Available for Reports:
Lastly, we can customize which fields from each object are available for the report.
- After saving, click ‘Edit Layout’.
- The ‘Fields’ column on the left-hand panel, allows you to search for fields or show the available fields. Available fields are fields that are not currently on the Report Type layout. To add them, drag and drop them into the object column on the right.
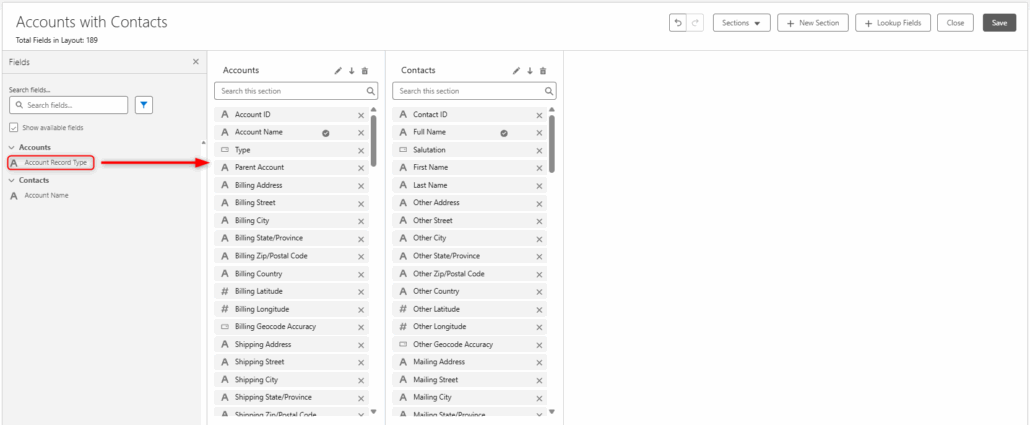
- You will also notice there are columns for each object that allows you to browse over the fields for both objects that you selected in the custom report type, to ensure fields from Account and Contact are visible in your report.
- If you are still not seeing fields that you need, there is also an option called ‘+ Lookup Fields’ which allows you to bring in additional fields by clicking on the available fields that are related to the selected object. More on adding fields via lookup can be found in this Salesforce article.
- Now, our Report Type is available for all users to leverage.