
To make all documents in your portal workspace read-only, please follow the instructions in this article. Instructions will also be provided for making specific sets of documents read-only.
Steps to make all documents in the workspace read-only:
- Open the Documents tab.
- Ensure the Category Type field is set to ‘All Categories’.
- Click the checkbox in the top left corner to select all documents.
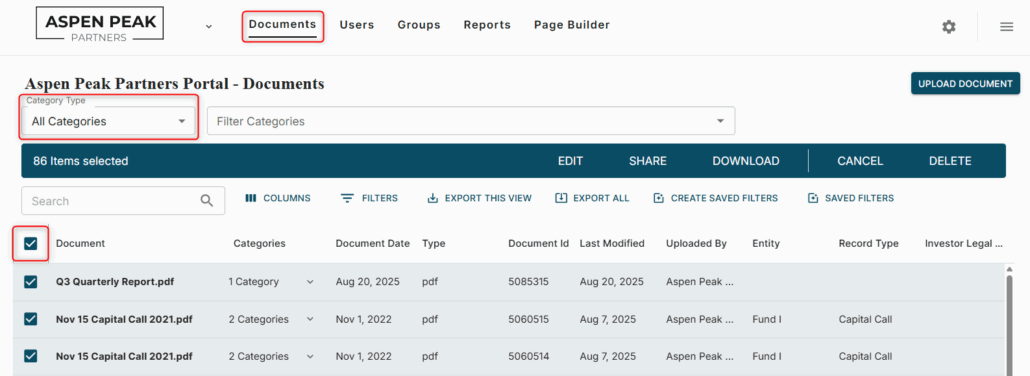
- Once all documents have been selected, click the ‘EDIT’ button.

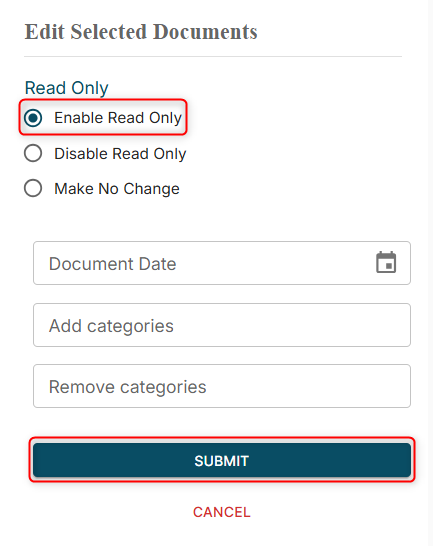
- Select the ‘Enable Read Only’ setting and ‘Submit’.
Steps to make a select group of documents in the workspace read-only:
Note: This will only be applicable if the documents you’d like to make read-only have at least one category assigned to them.
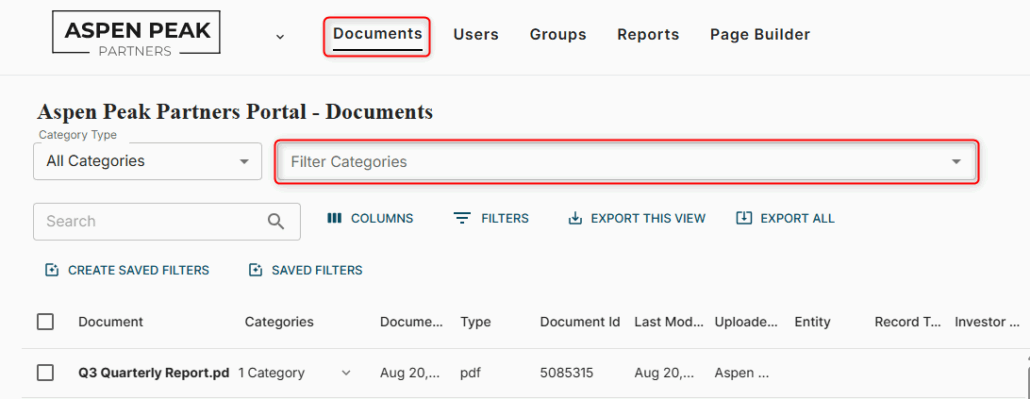
- Open the Documents tab
- Ensure the Category Type field is set to ‘All Categories’
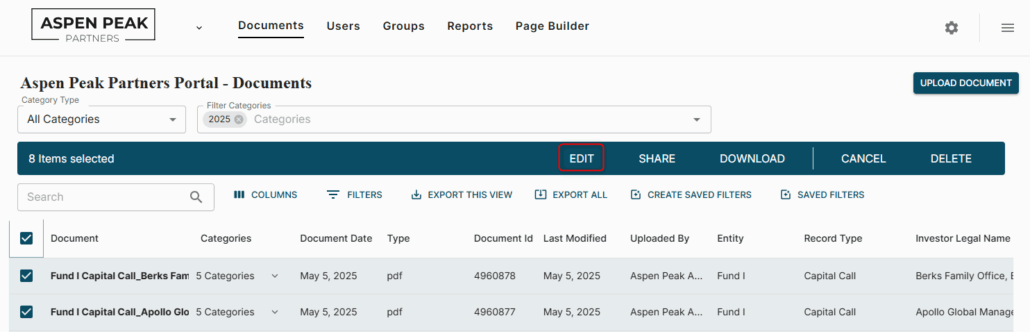
- Use the ‘Filter Categories’ drop-down to specify the documents you want to make read-only.
- Once the filter is applied, click the checkbox in the top left corner to select the documents.

- When the documents are selected, click the ‘EDIT’ button.
- Select the ‘Enable Read Only’ setting and ‘Submit’.