
Connect the two tools your team relies on most—Salesforce and Microsoft Outlook. Access and update Salesforce data right from your Outlook inbox, create new Salesforce records, and automatically capture emails in Salesforce. This keeps everyone aligned while eliminating time-consuming manual data entry.
Steps:
- Download and log in to the Salesforce Outlook plugin in your Outlook instance following the steps in this article.
- Once logged into the plugin, you will see various options pop up to create and view records, log emails and tasks, and view your Salesforce user settings, alerts, and homepage.
- Understanding and using the top bar (from left to right):
- The + button is used to create records, tasks, and events.
- The search bar will allow you to search records in your Salesforce instance.
- The square with the arrow will open up your Salesforce home page or the logged email.
- The bell will show you your alerts.
- The last icon (in this example, the Altvia logo) will open up your user settings.

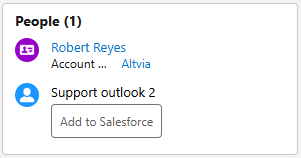
- In the People section, if a contact already exists, you can click on their name and edit the record. If the contact does not exist, use the ‘Add to Salesforce’ button to add the contact records.
- The ‘Log Email’ section is where you will log interactions. Select the ‘Log Now’ button to log the interaction immediately. This option only appears if the plugin recognizes an existing contact record.
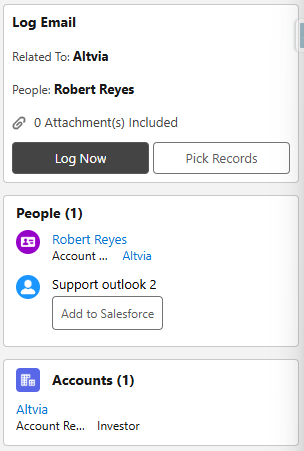
- If the ‘Log Now’ button does not appear or you need to select more records, utilize the ‘Pick Records’ button. This allows you to choose one or more contacts and one object record (i.e., an entity, investor, fundraising record, etc) to associate with your interaction.
- Use the dropdown to select which object. Then, use the search bar to find the record.
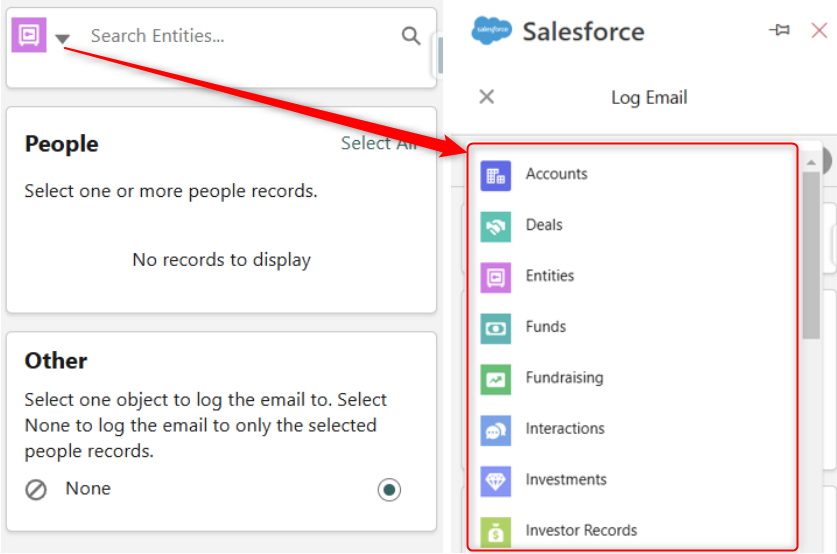
Note that when you select another record, the Account record will be deselected. However, through our cascade feature, the Account will automatically be referenced if the contact exists.
- Once you have selected the contacts and (optional) additional record to relate to your interaction, you will select ‘Save’ and your interaction will be saved to the CRM.

- Once the interaction is created, it can be viewed and edited within the CRM.
Was this helpful?
Thanks for your feedback!